Static Site with Jekyll and Github Pages
Best way for me to learn is by just start doing it.
This project started because I was looking to solve a problem at work with a documentation site. Thus down the rabbit hole this project was created.
I was looking at Hugo and Jekyll for an easy to host static webpage. Seemed straight forward enough , I have used gitbooks before and it wasnt much different. The goal was to create a document site that was only available to a internal CIDR range. We also needed to have a code repostory for version control and community contribution. I wanted to have this all in a CI/CD pipeline so that when someone made and update to documentation it redployed the site with the updated changes.
The site was just going to have a basic processes design to get someone new up and going, or where to look for xyz. I really didnt want to deal with authentication as it might be used by people without an account. Most of the people contributing to the site would be part of the technical team so learning markdown shouldn’t be an issue. Templates would be made and instructions on how to clone the repo and update would be created.
CI/CD and Repo
Jekyll and Github Pages
Jekyll Install Dependencies
Homebrew Install
Homebrew - if you dont have this you should

1
$ /bin/bash -c "$(curl -fsSL https://raw.githubusercontent.com/Homebrew/install/HEAD/install.sh)"
Jekyll Dependencies Installs
Installing this with a M1 Mac is a little… well a pain in the ass. It will require a few different commands to update things. Ill write up more on this later.
Install chruby and ruby-install with Homebrew
1
brew install chruby ruby-install
Install the latest stable version of Ruby
1
ruby-install ruby
Check which shell your using with the command - echo $SHELL
Configure your Shell (.zshrc) to use chruby
1
2
3
echo "source $(brew --prefix)/opt/chruby/share/chruby/chruby.sh" >> ~/.zshrc
echo "source $(brew --prefix)/opt/chruby/share/chruby/auto.sh" >> ~/.zshrc
echo "chruby ruby-3.1.1" >> ~/.zshrc
Configure your Shell (.bash_profile) to use chruby
1
2
3
echo "source $(brew --prefix)/opt/chruby/share/chruby/chruby.sh" >> ~/.bash_profile
echo "source $(brew --prefix)/opt/chruby/share/chruby/auto.sh" >> ~/.bash_profile
echo "chruby ruby-3.1.1" >> ~/.bash_profile
Quit and relaunch Terminal to make sure everything is working.
1
ruby -v
Jekyll Install
1
gem install jekyll
Build your first site
Creating a new site only has a few simple steps. This will create a site at ./mysite
1
jekyll new mysite
Go into the directory that was created.
1
cd mysite
Build the site and launch it locally
1
bundle exec jekyll serve
If everything goes correctly you should be able to see your site at http://localhost:4000
Github Pages
So now that you have your Jekyll Site created lets host it. I used github for my repositories, so were going to use github action and github pages for hosting the site.
Copy all the files from the directory that Jekyll created when you made a new site. Dont worry about adding content yet. lets just make sure we can get the site deployed first.
inside the repo for the Jekyll site go into settings. Then click on the pages tab.
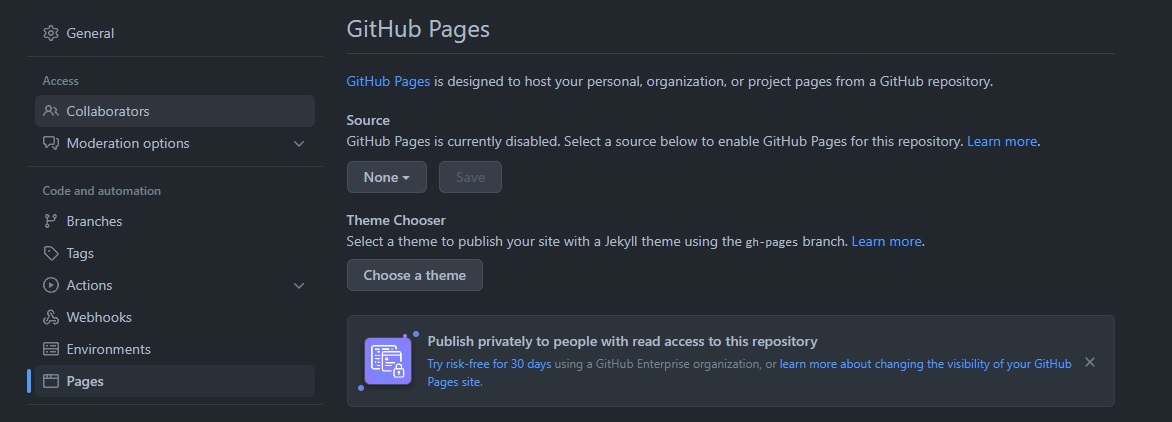
For the Source pick the master branch and click save. This should start the process of deploying your jekyll site to github pages.
If you want to add a custom domain create 4 A records for the following ip address in your domain registrar or hosting provider.
1
2
3
4
185.199.108.153
185.199.109.153
185.199.110.153
185.199.111.153
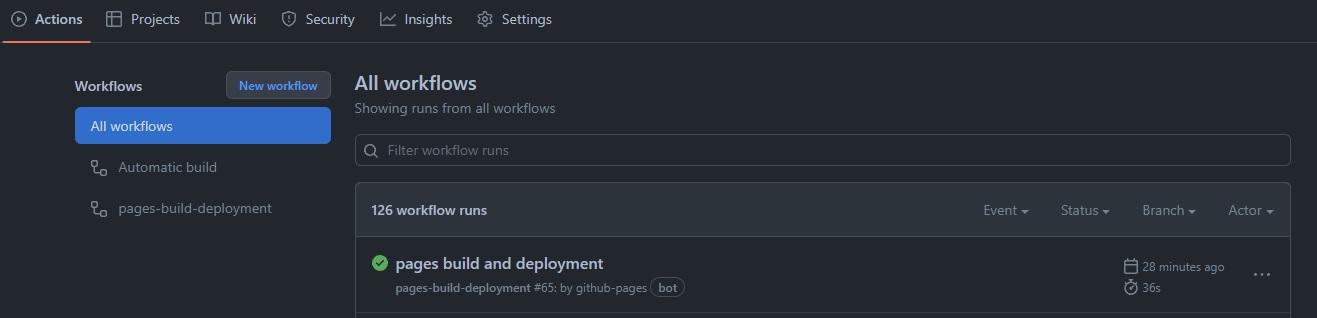
Once you click save on the pages tab you should be able to switch over to the Actions tab at the top of the repo and see the site start building.
Once completed you should see your sites url in the github page settings. If you didnt use a custom domain it may look something like
Your site is ready to be published at https://yourgithub.github.io/site/
Once you verify everything is working, you can now use your IDE to clone and make updates. Each time you update your repo github pages will redeploy the site with the updated changes.